
How to Create GA4 Events – Manually or Using Google Tag Manager

Colin Differ
21 January 2023
Tracking what users do on your site—not just which pages they land on—is essential for meaningful insight. With Google Analytics 4 (GA4), everything revolves around events. Whether someone lands on a page, clicks a button, watches a video, or submits a form, it’s all tracked via events.
This guide covers how to create GA4 events manually or through Google Tag Manager (GTM), with practical examples and best practices.
Types of Events
| Type | Description | Setup Required? |
|---|---|---|
| Automatically Collected | Page views, session starts, first visits | ❌ |
| Enhanced Measurement | Scrolls, file downloads, outbound clicks | ✅ in GA4 Platform |
| Recommended | Predefined names (e.g. login, purchase) for richer data |
✅ |
| Custom | Fully bespoke events with your own names and parameters | ✅ |
In this guide, we focus on custom and recommended events.
Common event examples:
- Button clicks (e.g. “Sign Up”)
- Form submissions
- Video interactions
- File downloads
- Outbound link clicks
- Popup views
- Add-to-cart actions
GA4 Event Structure
Unlike the old Category/Action/Label format, GA4 events consist of:
- Event Name: what happened
- Optional Parameters: additional context (e.g. which button was clicked)
GA4 Event Components
1. Event Name (required)
The core identifier of your event. Appears in the GA4 Events report.
Examples:
cta_clickform_submitvideo_startfile_download
2. Event Parameters (optional)
Add detail to your events. You can define up to 25 parameters per event.
| Parameter Name | What it Captures | Example Value |
|---|---|---|
button_text |
Text shown on a button | “Subscribe Now” |
form_id |
Unique ID of a form | “contact-us-form” |
click_url |
Click destination | “https://example.com/pricing” |
value |
Monetary/time value | 29.99 |
Register parameters as custom dimensions/metrics in GA4 for better reporting.
3. Non-Interaction Equivalent (Engagement)
GA4 uses engaged sessions instead of a “nonInteraction” flag. Engagement occurs if:
- A session lasts longer than 10 seconds
- OR the user triggers a conversion event
- OR the user views multiple screens/pages
To exclude an event from engagement metrics, set:
'engagement_time_msec': 0How to Set Up GA4 Events Manually (Without GTM)
Manual setup involves placing gtag.js code directly in your site’s HTML or JavaScript.
Example: CTA Button
<a href="https://your-site.com/booking" onclick="gtag('event', 'cta_click', {
  'button_text': 'Book Now',
  'click_url': 'https://your-site.com/booking',
  'page_title': document.title,
  'button_id': 'book-now-header',
  'button_position': 'header',
  'campaign_source': 'homepage-banner',
  'engagement_time_msec': 1
});">Book Now</a>
Notes:
- Use meaningful event names
- Add parameters for detail
- Test with GA4 DebugView
How to Set Up GA4 Events Using Google Tag Manager
Using GTM is easier, more scalable, and doesn’t require touching site code.
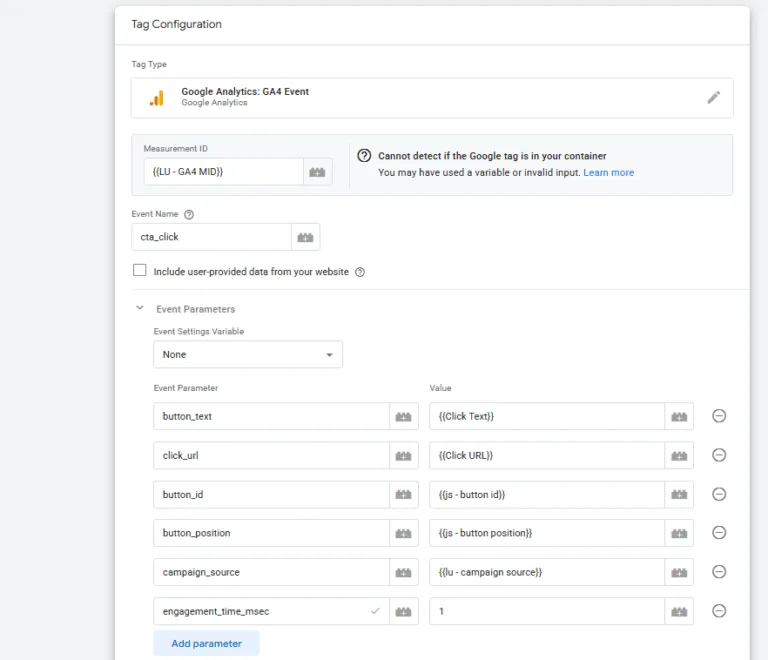
Step 2: Create a GA4 Event Tag
-
Go to Tags > New
-
Select GA4 Event
-
Choose your GA4 Configuration Tag
-
Set your Event Name – for example:
cta_click -
Under Event Parameters, add:
| Parameter Name | Value (via GTM Variable) |
|---|---|
button_text |
{{Click Text}} |
click_url |
{{Click URL}} |
page_title |
{{Page Title}} |
button_id |
Custom JS variable or DOM lookup |
button_position |
Custom constant or lookup variable |
campaign_source |
Custom constant or lookup variable |
engagement_time_msec |
1 (or 0 if you want to exclude it from engagement metrics) |
Tip: Use Built-In and Custom Variables
Enable built-in variables in GTM:
-
Click Text -
Click URL -
Page URL -
Page Path -
Page Title
Create custom variables for:
-
button_id(use DOM Element ID or Data Layer lookup) -
button_position(e.g. based on CSS class or using a Lookup Table) -
campaign_source(pass static values or use data attributes)
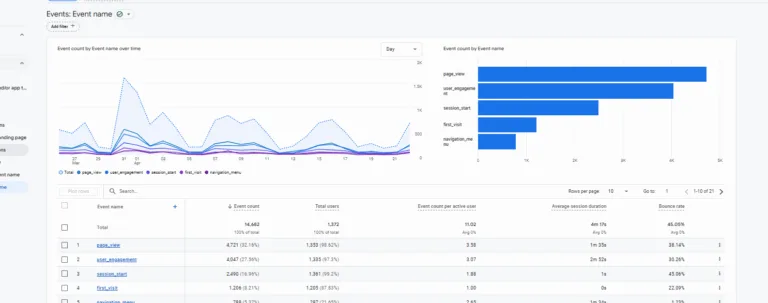
Testing and Debugging
In GTM
- Click Preview
- Interact with the site
- Check the Tag Assistant interface
In GA4
- Go to Admin > DebugView
- View real-time events
Troubleshooting:
- Ensure tags fire
- Double-check Measurement ID
- Review cookie/consent settings
Best Practices
- Use consistent lowercase names with underscores (e.g.
form_submit) - Group related events under a single tag where possible
- Test before publishing
- Register parameters in Custom Definitions for easier reporting
Example Use Cases
| What You’re Tracking | Event Name | Key Parameters |
|---|---|---|
| CTA Button Click | cta_click |
button_text, page_location |
| Form Submission | form_submit |
form_id, page_path |
| File Download | file_download |
file_name, click_url |
| Popup View | popup_view |
popup_id, trigger_reason |
| Product Added to Basket | add_to_cart |
product_id, price, quantity |
Conclusion
Google Analytics 4 gives you the tools to track what really matters — user actions, not just pageviews. With its flexible, event-driven model, you can tailor your measurement strategy to reflect actual user behaviour, whether it’s a click, a scroll, a form submission or a transaction.
Whether you’re implementing events manually or through Google Tag Manager, the key to success is the same:
-
Define events clearly
-
Capture meaningful parameters
-
Test relentlessly before publishing
Do this well, and you’ll unlock cleaner data, richer insights, and more accurate reporting — helping you make smarter, faster decisions.
Need Some Help?
If you’d like to find out more about how to Track Events, come and join us at our Google Analytics Training and Google Tag Manager Training sessions. We also offer a wide range of Analytics services and Google Tag Manager consultancy services


